Label Piano Keys for Beginners


Should I label the piano keys or will this learning tool become a crutch? If you are asking these questions, you are not alone!
Learning styles differ from person to person. If one student can find their hand position and learn the notes without labels, great! However, if labeling the piano keys helps a beginning student grow in knowledge and gain confidence, why not?
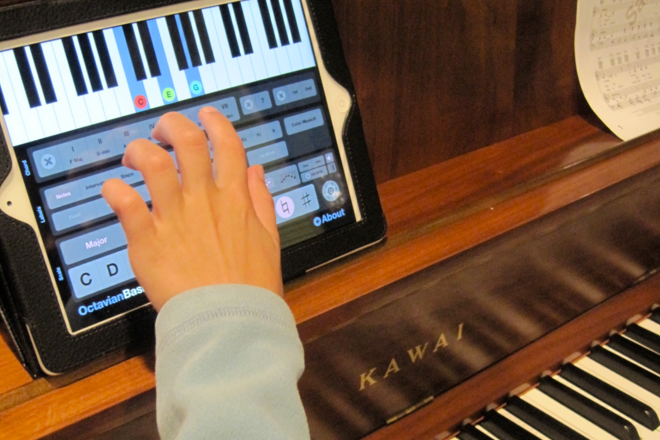
The Simply Piano app has no right or wrong answer regarding labeling your piano keys. We believe that learning music should be fun and accessible to all students.
Want to know how to label piano keys? Let’s dive in!
The music alphabet.
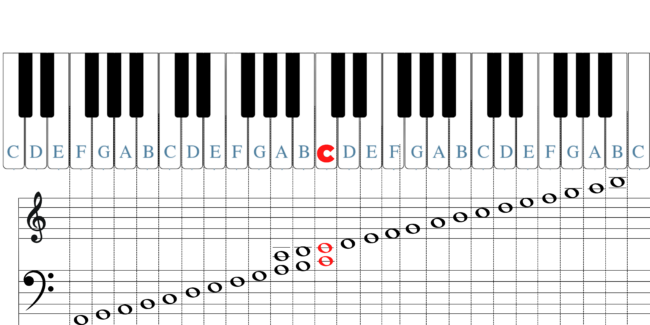
The music alphabet has seven letters: A, B, C, D, E, F, and G. In written music, these letters hang out on lines and spaces on the staff.
Middle C is dead center between the bass clef and treble clef. From C, you can head up the treble clef with D, E, F, G, and so on. Or, you can back down the bass clef, reciting the alphabet backward with B, A, G, F, etc.
Similarly, the piano has a very linear layout. The first white key will be A if you start at the bottom of an 88-key piano. So on the white keys, you just go up saying “A, B, C, D, E, F, G” over and over until you reach the last key or run out of breath.
Sharps and flats.
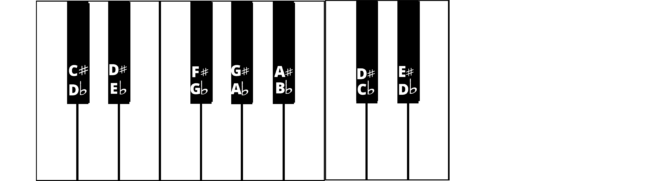
The black keys can be a bit trickier. These five black keys have ten different names! You can read the names as sharps if you go up the scale. If you start from middle C, your first black key will be C#, then D#, F#, G#, and A#. However, you can read these same keys as flats: D♭, E♭, G♭, A♭, B♭.
Most popular ways to label piano keys.
So now that we’ve gone over some note names, how do you label piano keys for beginners? There are four popular ways to go about it. (And, no, writing on your grandmother’s ivory keys in a permanent marker is not on this list.)
1. The dry-erase marker
A dry erase marker is the simplest way to put note names on keys. Plus, it’s a temporary fix that wipes off easily. However, as you play, the letters may wear off too easily and disappear altogether during practice.
This means you will need to rewrite the letter names again and again.
But hey, the repetition could help you get those notes down!
2. Sticky labels with letter notes
Writing the note names on sticky labels is probably the most common method for matching letter names to piano keys. You can use white dot stickers or cut-up sticky name tags to fit your keys.
Some beginners choose only to label the portion of the piano that they will be using in their pieces. This can be the starting hand position or the octaves below and above middle C.
Other students want to label all 88 keys to get the big picture.
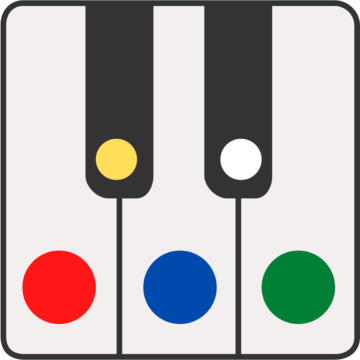
3. Color-coded dots
Color-coded dots can also be a great way to find notes on the piano. This is especially true for younger students learning their letters.
The trick to this method is consistency.
Choose one color to represent all the As, another to represent the B notes, a different color for C keys, and so on.
Some music notation software even allows you to color-code the written music notes to match!
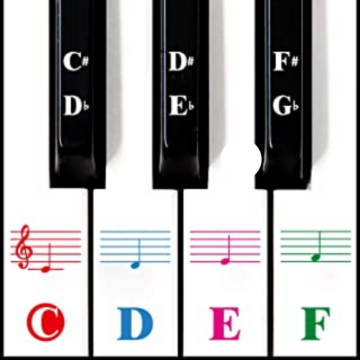
4. Pre-printed labels with letter notes and staff notes
If you want to go all out, you can choose labels that show the letter names, sharps, flats, and the note as it appears on the staff. If you find it way too time-consuming to write all these out on tiny stickers, you can buy them ready-made on Amazon.
These piano stickers for beginners may be helpful for detail-oriented students. However, some students may find a load of information a bit overwhelming.
How to label notes on a piano keyboard.
To start labeling your piano keys, we’ll give you a few simple indicators to help you find the right notes. On a standard 88-key piano, you can start at the first white note at the bottom, A, and work your way up. However, this method is ineffective if you have a keyboard because the lowest starting note can vary.
Finding middle C is key.
Another way to label your keys correctly is to use middle C as your guiding star. Just like written music, the piano focuses on middle C.
You’ll find that both your thumbs rest on the middle C key for the beginning hand position. This white, L-shaped key can be your ‘key’ for finding all the other keys. So, how do you find it on the piano?
You’ll notice groups of two black and three black keys on the piano. Find the pair of black keys and look to the left to find the C note. This note is C.
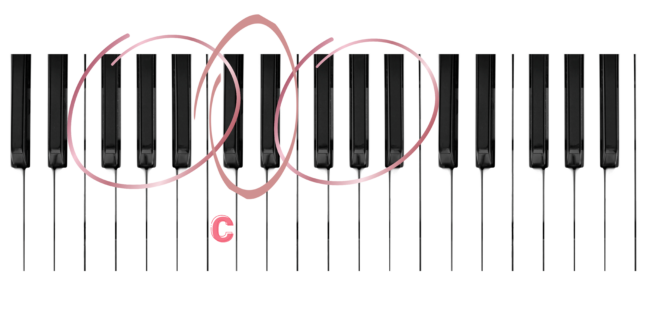
On a regular 88-key piano, middle C is often called C4 because it’s the fourth C key on the piano. Middle C is the closest C to the middle on an 88-key piano.
What a coincidence, right?
Those tricky black keys.
The ABC note names are as easy as ‘123’ once you catch onto the pattern. But, the black keys can get a little trickier. If you want to label the black keys, remember that each has sharp and flat names. Which name you use will depend on which key you are in.
You can include both names on your piano key markers (like C# and Db). Or, you can just remember that going up from a C is C#, and coming down from a D is Db.
Label your piano for the starting hand position.
Not interested in labeling all 88 keys on your piano? That’s okay. More isn’t always better. You can begin with just a few notes and build out from there.
For starting hand position, you will rest your right thumb on middle C and your pinky on G. Your left thumb can also rest on middle C with your pinky on F in the bass clef.
Start labeling just the white keys until you know these notes by heart. Then, as you get comfortable, add in more notes.
Learn the piano keys & play with both hands!
Memorizing the note names on the piano can be tricky, but labeling the keyboard keys can help.
We are here to support you in your journey if you are looking for more ways to build confidence in your skills.
Most beginner students who enroll in our programs learn to play songs with two hands in less than two weeks. Music is our passion, and our goal is that students learn the piano and have fun along the way.
FAQs.